What is a Stage Plot?
A stage plot visually represents the placement of gear on stage. Artists, bands, and other performers use it as a way to communicate the on-stage location of equipment.
A thorough stage plot typically outlines the placement of amplifiers, instruments, monitors, band members, risers, power needs, and other pertinent details that will be needed during a performance. It is shared with the venue and local technicians in advance of the performance.
It’s a good idea to include the band or artist’s name, the contact information of the person advancing production, and when the document was last updated.
What is an Input List?
An input list includes information such as the name and type of each source (e.g., kick drum, guitar, vocals), the input channel number, and any other relevant technical details.
Some examples might include microphone preference, type of mic stand or clip, stage location, stage box assignment, and any effects settings. The list may also include notes or instructions for the sound engineer or technician, such as suggested EQ settings or recommended levels.
Input lists are typically created by the performers or producers in advance of the performance or recording session, and are provided to the sound engineer or recording technician to help them prepare and manage the audio inputs. Input lists can be created using specialized software or simply as a spreadsheet or document.
What is a Technical Rider?
A technical rider is a document that provides detailed information about the technical requirements for a performance or event. It is typically used by musicians, performers, or production teams to communicate their specific technical needs to venue staff or event organizers.
A tech rider can include information about a wide range of technical aspects of the performance, such as sound, lighting, stage design, and other production requirements.
A stage plot and input list are parts of the tech rider. They will accompany the hospitality rider and other documents that you will advance with the venue.
When preparing for a performance or event, a detailed technical rider is often created to ensure that all necessary technical requirements are met and the performance is carried out successfully.
This is especially important given the need for clear communication and coordination among touring personnel and local staff.
Why Every Performer Needs a Stage Plot
Creating an accurate stage plot and input list helps to communicate technical needs to venues and music festivals.
A well-executed stage plot and input list can help to minimize technical difficulties, reduce set-up and soundcheck time, and contribute to a more enjoyable experience for both the performer and the audience.
These documents help local staff and technicians prepare for your performance. In a busy festival environment, it can mean the difference between an easy changeover or an absolute sufferfest.
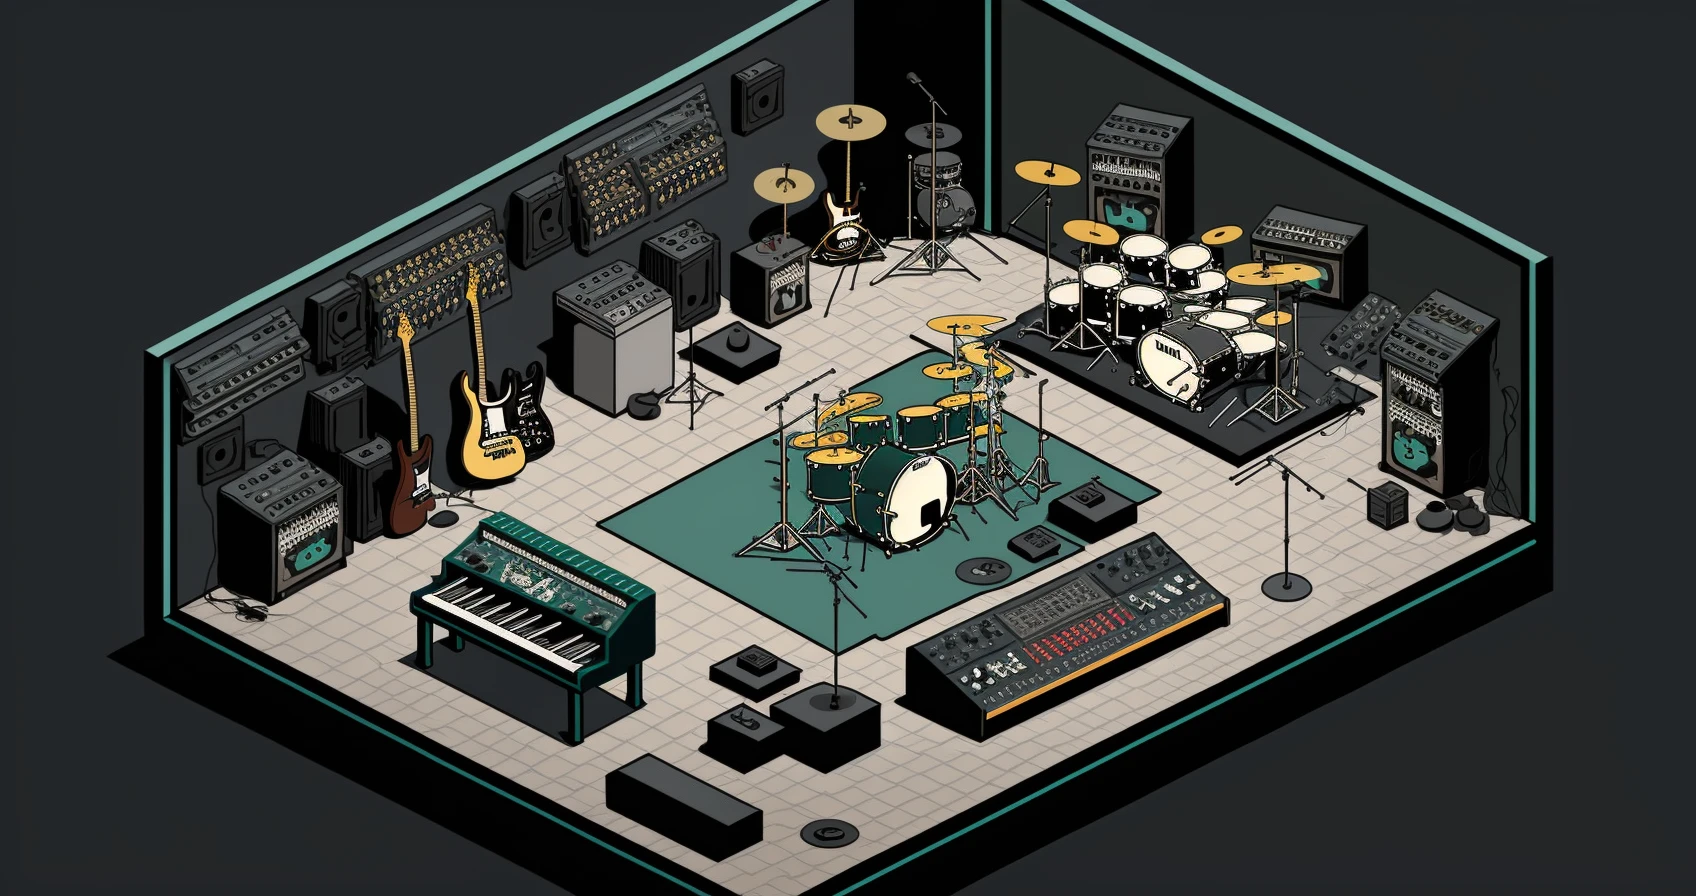
Example Stage Plot

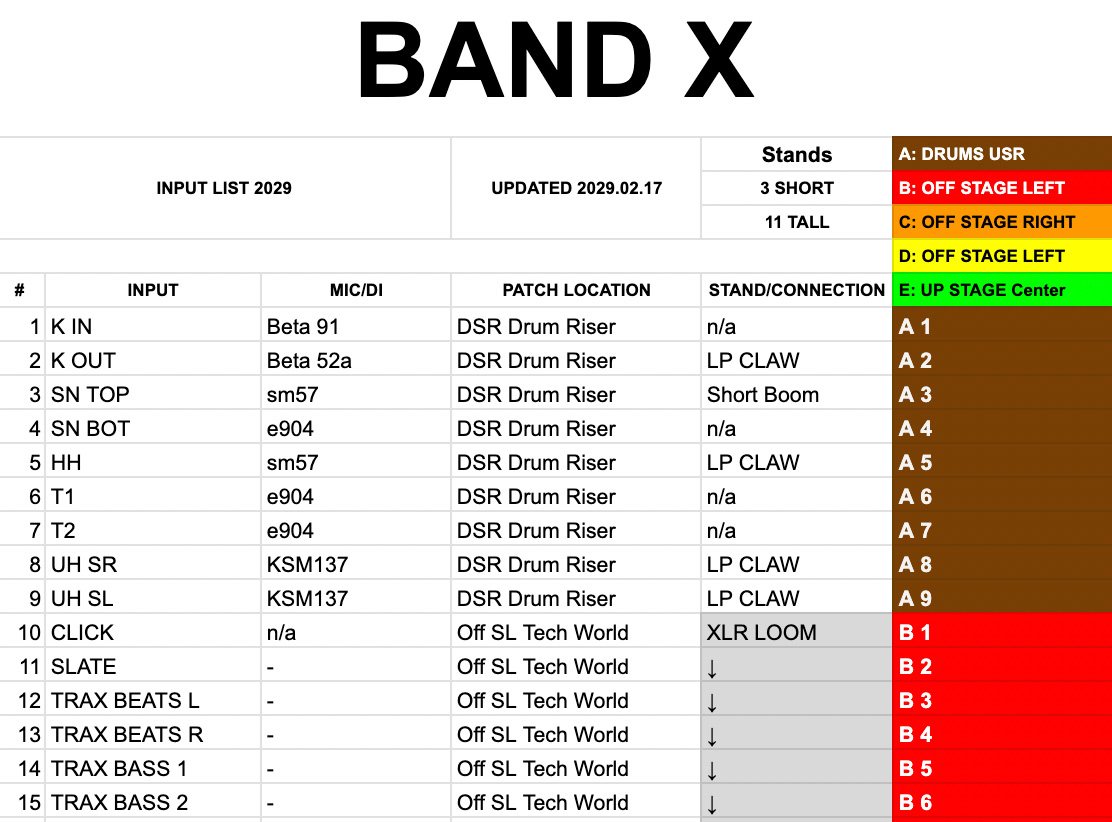
Example Input List
Software to Create a Stage Plot
There are a number of online tools available to help generate an accurate stage plot. You really shouldn’t need anything fancy.
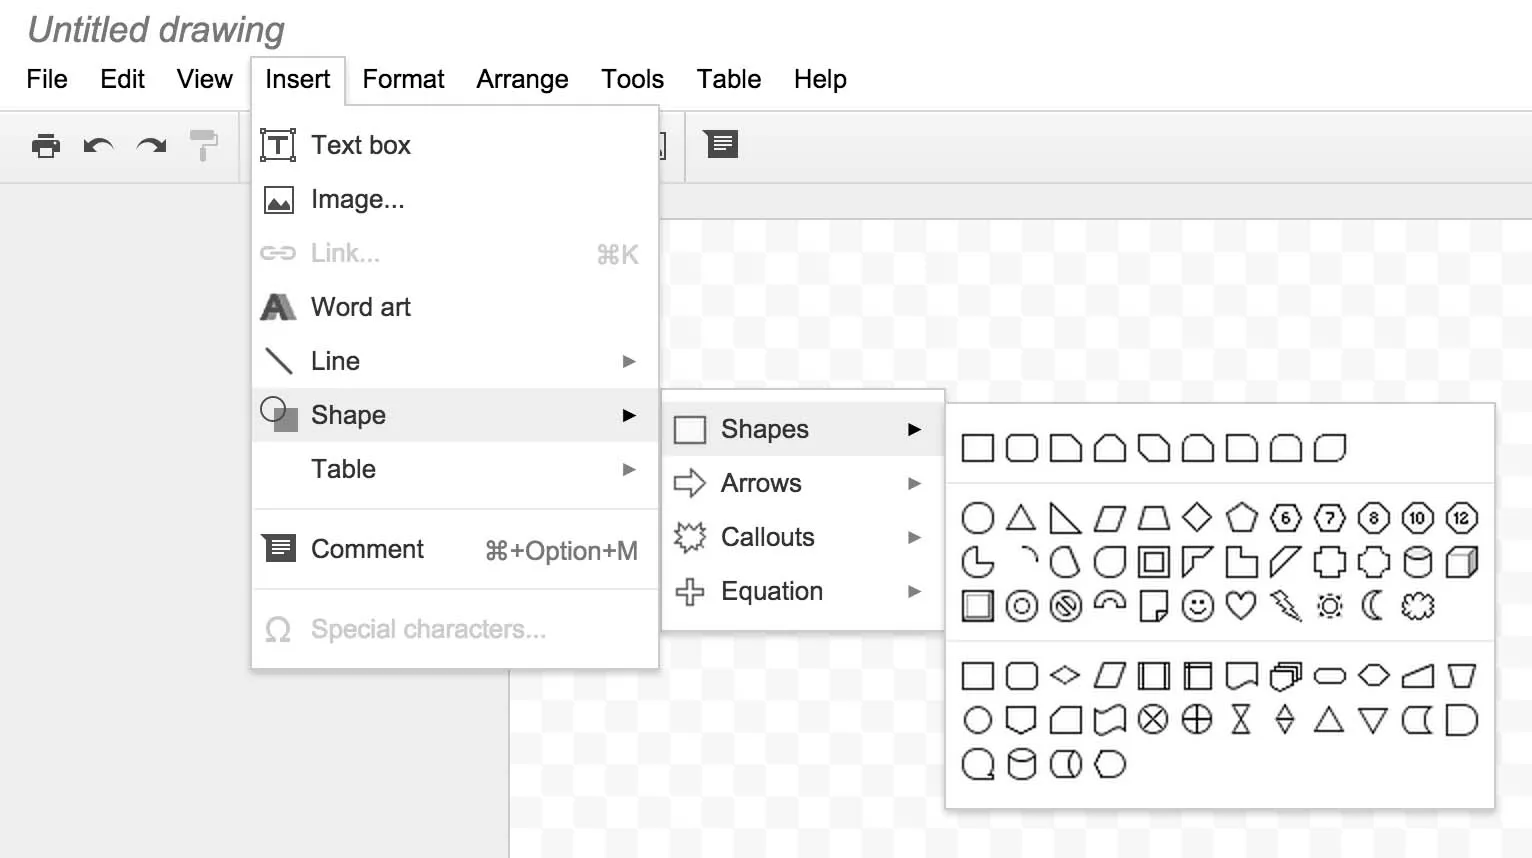
Google Draw is an excellent free solution for creating a quality stage plot. It is intuitive and easy to use. Aim to create something that is clear, concise, and gets the point across. Adobe Photoshop is another program that would work.
Paid solutions also exist online. Some of those include StagePlotPro, StagePlot Guru, and Stage Plot Designer. Try out a few to find the perfect app that works for you.
How to Make a Stage Plot and Input List
1. Identify the performance elements
Determine the number of musicians, instruments, microphones, monitors, and any other necessary equipment.
2. Determine the stage layout
This includes the size and shape of the stage, as well as any fixed features such as risers or platforms.
3. Sketch the stage plan
Create a diagram of the stage, including the location of all equipment, instruments, and musicians. Use symbols or color coding to differentiate between different types of equipment.
4. Label the equipment
Make sure to label equipment with any pertinent info, and note any power drops.
5. Create an input list
Make a list of all the inputs required for the performance, including the number of channels, type of input, and any additional information (microphone selection, mic stands, etc).
6. Include any special requests
If there are any special requests or requirements, such as specific lighting cues or sound effects, make sure to include them on the stage plot and input list. This is particularly helpful if you’re touring with an act who is not traveling with audio or lighting engineers.
Advancing Your Stage Plot
Local production managers and stage managers love receiving accurate, up-to-date information. Help them help you. Consider hosting your most up-to-date tech rider online in a shared folder. When advancing include a link to this folder. Always keep the folder updated so the most up-to-date version is readily available.
On the day of your performance, it’s a good idea to print off a few hard copies of your stage plot and input list to have on hand. This will help communicate information to the local stage manager and any local techs who need quick access to information.
Keeping Your Stage Plot Updated
It’s a good idea to keep your stage plot and input list current to avoid any issues when advancing. Ensure that you update your advancing documents as subtle elements change with your stage setup. This is another part of staying organized as a tour manager.
Make sure to pass along up to date documents to the booking agency and management. This helps to minimize any outdated riders from floating around in error.
What’s the Difference? Stage Left vs Stage Right
There are nine stage positions and they are all from the performer’s perspective, looking out into the audience. Your left arm is stage left, and your right arm is stage right. In front of you is downstage, and behind you is upstage.
The different stage positions are as follows: upstage left, upstage center, upstage right, stage left, center stage, stage right, downstage left, downstage center, and downstage right.
Consider labeling road cases with stage locations to help expedite load-in and set-up.
Conclusion
Creating a stage plot and input list is a great way to improve communication during the advancing process. It’s something that every professional touring operation should have. There are many different ways to create these documents, but the main goal is to create something that is simple to read and easy to understand.