Creating a gear manifest is a necessary piece of the touring puzzle.
Doing this properly from the get-go is going to save you a ton of headaches before your tour gets out the door. This is one of those laundry list tasks that should be done during prep days at rehearsal.
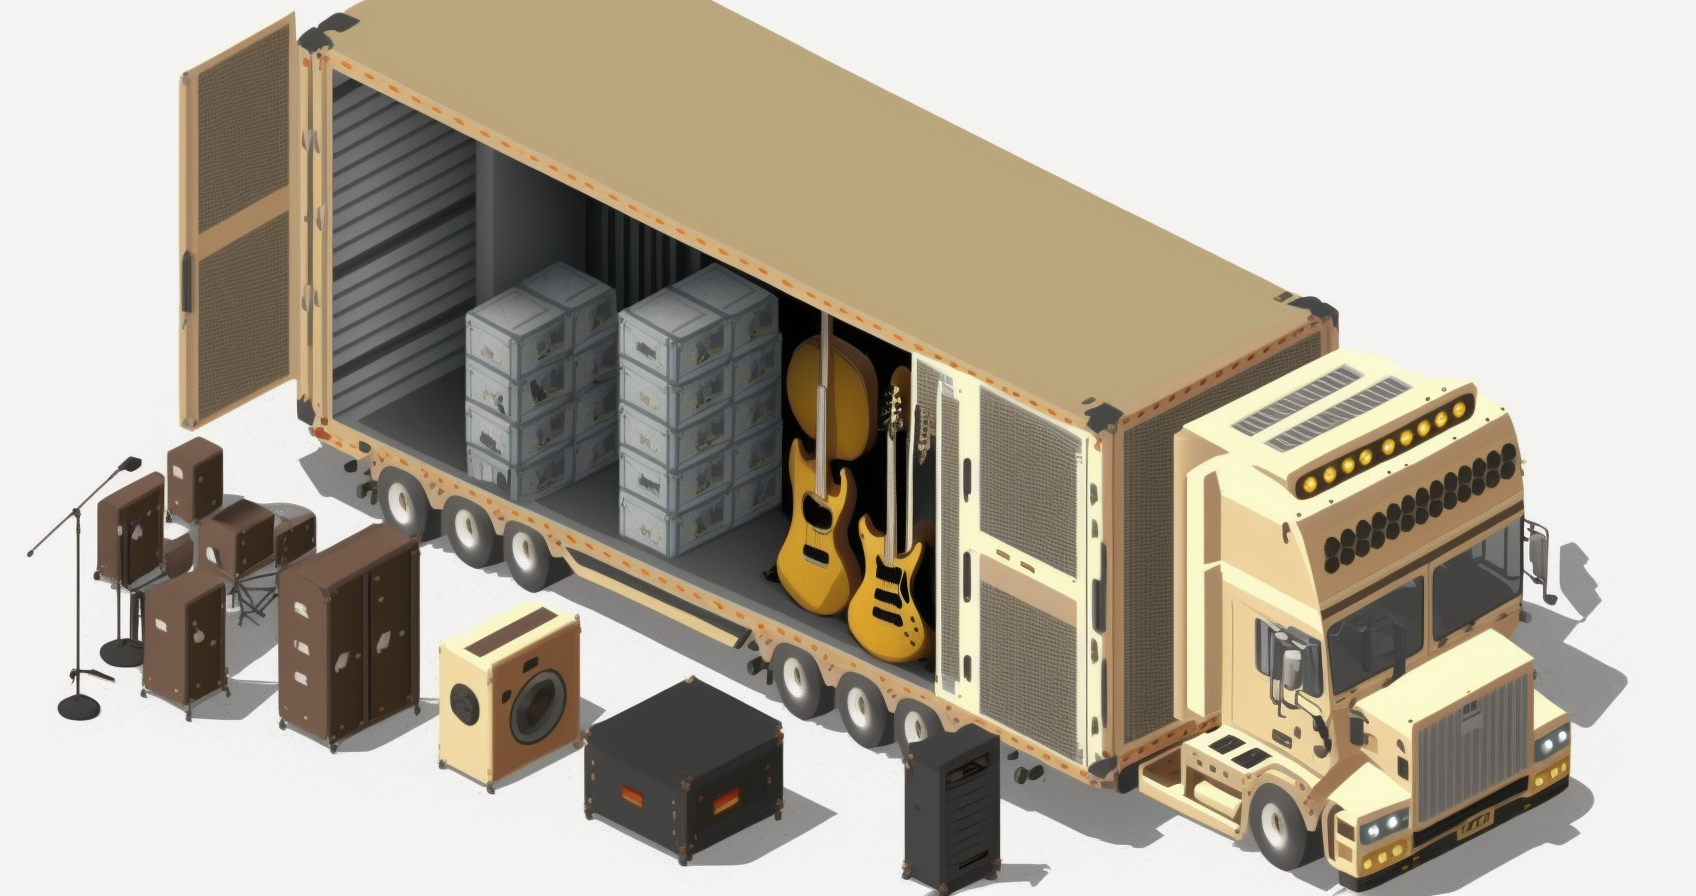
If production gear is getting loaded onto a truck or trailer, there needs to be a proper record of it. This includes both artist-owned equipment and gear sourced from vendors.
This becomes doubly important at the tail end of a tour when gear goes into storage. Through the passage of time, people tend to forget what gets stored and where so having documentation is a gift to your future self.
The Importance of a Gear Manifest
On the most basic level, a gear manifest is a snapshot of what gear and production equipment you’re traveling with on the road.
This does not include personal items or merchandise. Those items should be inventoried and kept on a separate manifest.
Having a working inventory is important for a number of reasons.
For artist-owned equipment, it can be used to update insurance policies that help cover theft and accident.
If touring internationally, it can lend itself to creating a carnet. A carnet is essentially a passport for your gear that needs to be stamped when entering and exiting different countries.
Without a carnet, you run the risk of being charged taxes and fees for the perceived import or export of equipment. Please note that you can not add items to a carnet. You can travel with less, but once it’s created, you can’t add to it.
It can also help when creating a trailer pack and ensuring you aren’t exceeding trailer weight limits. There are programs such as EasyCargo3D that can import dimensions and help create an efficient truck pack.
How to Create Your Gear Manifest
A gear manifest is a document that should be clearly organized, easy to make sense of, and include all necessary details describing your gear.
The goal is to create something that can be easily understood by someone who isn’t familiar with the nuances of your camp, can be handed off if necessary, and would answer any questions a cartage or insurance company would have.
Here are the basic steps when creating a gear manifest:
Step 1: Organize By Production Category
As you index everything, a good idea is to separate items into their respective production categories.
For example, the backline would all be included together and not mixed in with audio or lighting.
If you’re hiring gear from a vendor, they likely already have all of this on file, and you can request it from them. Then you just need to figure out how to best include that in your indexing. Items that land in the production office would be separate, and so on and so forth.
Listing everything in ascending order is one way of doing it, or separating departments onto different pages or sheets is another way. There isn’t really a right or wrong way, as long as the information is easy to follow.
Step 2: Assign Numbers to Cases
For example, you might have a Pelican case that is used to carry items for the touring production office. There is the case itself that will receive a number, and then the items inside the case will also receive a number assignment.
The production office pelican might be labeled 101. The contents inside could be labeled as 102, 103, 104, or you could decide to use a nested labeling system. This would read as 101.1, 101.2, 101.3. Again, whatever makes sense for your brain and organization.
This is beyond the scope of this article, but while you’re in labeling mode, consider adding where the item should end up on stage (Stage Left, Stage Right, etc.)
Step 3: Include a Detailed Description of Case and Contents
Next to the assigned number, include the following categories:
- Item Description (including serial number and identifying marks)
- Number of Items
- Weight (specify kilograms or pounds)
- Dimensions (specify metric or inches)
- Value (specify currency)
- Country of Origin
- Photograph
- QR Code
Assigning weight and dimensions for an overall case is sufficient. You really only need sizing and weight for the case.
At the bottom of your manifest, you should include totals for value and weight. Knowing weight and dimensions is important for trailer packs, along with staying within certain parameters if checking gear onto a flight.
Step 4: Document Case and Contents with Photography
The more detailed information you can provide the better prepared you will be when you need that information in the future.
Photographs of instruments, serial numbers, identifying marks, and the cases they are traveling in, are all great to have on file.
Should you ever be the unfortunate victim of theft, you are going to want to circulate this information quickly. This manifest might end up saving your gear.
Step 5: Assign a QR Code to Case Contents
Assigning a QR code to a case is a great way to help in staying organized. Have the number link back to the case, case contents, and any photo documentation.
Consider having this printed on hard plastic to lengthen the lifespan of readability before it gets chewed up by road movements.
Being able to quickly scan a QR code to bring up information related to the case and contents can only help when crossing international borders.
Show them you are prepared can help reduce questions and snags at international border crossings.
Assigning QR codes can also help when pulling items to make a fly pack.
Managing Your Gear Manifest on the Road: Best Practices
This is all pretty straightforward, but if not managed properly, it can lead to confusion as time passes.
The basic tenants are:
- If you add gear, add it to the manifest.
- If you remove gear, remove it from the manifest.
- If you pull the gear off the truck for a press event, make sure the stage manager is aware before the load out.
- At the end of a tour, confirm that the gear going into storage matches what’s on the manifest and make any necessary updates.
Case Study: A Touring Band’s Gear Manifest in Action
For a smaller artist who is touring in a van and trailer, having a gear manifest is mission-critical.
The unfortunate truth is that van tours are easy targets for thieves. Time and time again, band vans and trailers get robbed.
Being able to quickly circulate your gear manifest via socials might actually help in recovering your items. Spreading the word with pawn shops, and other local vendors in the area can help to keep an eye out.
Additionally, this is going to help when it comes time to file the claim with insurance. Isn’t touring fun?
Another thought is to consider adding AirTags into certain cases to help keep tabs on their whereabouts. This is useful in a theft scenario, but also for fly dates. No worse feeling than when the pedal board doesn’t pop out at oversized baggage.
On a less nefarious level, sometimes gear is accidentally left behind. Having photos of what is missing can help local staff from the previous tour date help identify what you’re trying to track down.
Gear Manifest Templates and Tools
Microsoft Excel, Google Sheets, and AirTable are all great solutions for creating a touring gear manifest.
Finally, here is a sample gear manifest template to get you started.